How to buff a black car for maximum gloss and shine!
3/11/10

Buffing black cars can be really challenging. The following guide will walk you through the process to help you achieve the best possible results. Plus, if you can do a good job on black cars, you should be able to add a beautiful, high-gloss shine to other colors as well.
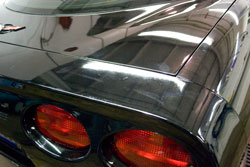
Black is not really any different than other colors, it just tends to amplify even the tiniest imperfections. That makes it tough to get a mirror-like finish, free of scratches and swirls. But, if you follow the tips in this article, you can achieve outstanding results and get a flat, flawless, high-gloss finish.
Buffing tips and tricks: While there are thousands of ways to buff, we recommend following these simple guidelines to ensure the best possible results. Here are a few of our favorite tips and tricks:
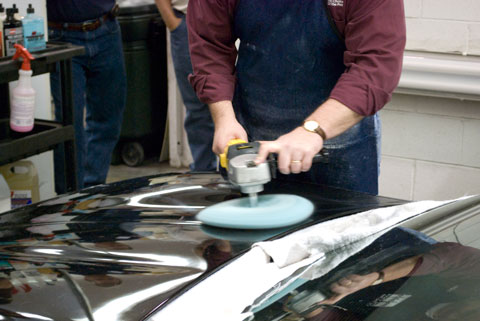
- Technique: Always keep the buffer as flat as possible. Move the buffer front to back and side to side in a crisscross pattern overlapping about 50% with each pass. Keep the buffer moving, don't let it sit too long in one place. Following these simple techniques will maximize effectiveness while minimizing swirls.
- Buffer Speed: For cutting and compounding with wool pads, set your buffer at about 1800-2000 rmp. For polishing with a foam pad, set your buffer to about 1000-1400 rpm.
- Keep Your Buffing Pad Clean: Use a buffing spur or conditioning brush to regularly remove excess compound, dirt and debris from your pads. Consider purchasing a buffing pad washer to clean and recondition pads. And, be sure to replace pads often – do NOT overuse pads. It's just not worth it.
- Keep Pads Moist: This is especially important for polishing with a foam pad. Foam tends to dry out quickly, and keeping your pad and compound moist minimizes the risk of dry compound and dust adding swirls back into your paint. We recommend using Presta Spray 'n Shine to keep the pad moist and bring out the gloss.
- Buffing Hoods: The one place that you'll notice remaining swirls the most is looking out over the hood from the driver's seat. To minimize this effect, we recommend your finishing polish passes go in smooth strokes from the windshield to the grille. If any swirls and lines are left over, they'll be far less noticeable than if they're running left-to-right from fender to fender.
Getting Started:
 Assess the condition of the paint: This is especially important if you're buffing a customer's car. Knowing what can realistically be accomplished through chemical reconditioning and setting the customer's expectations are important first steps. Plus, whether you're buffing your own car, or a customer's car, you're going to want to start with the least aggressive compound that will get the job done. This is because 1) you will remove less clear coat and 2) you will save time removing scratches left behind by aggressive compounding.
Select the appropriate compound and buffing pad: For heavy damage, you'll want to do a three-step process. We recommend starting with Presta Ultra Cutting Creme and a black wool heavy-cut buffing pad. This combination will remove heavy to medium scratches, oxidation, waterspots and acid rain damage. It will even remove up to 1200-grit wet sand scratches.
For step two, we recommend Presta Ultra Polish and a green wool medium-cut buffing pad. This combination removes any left over imperfections and polishes away scratches and swirl marks left behind from the more aggressive compounding done with Ultra Cutting Creme.
Finally, for step three, we recommend Presta Swirl Remover and a blue foam polishing pad. This combination flattens out the clear and leaves a smooth finish free of scratches and swirl marks.
For less severe damage, you may want to do a two-step process. We recommend starting with Presta Ultra Cutting Creme Light to clean up scratches and defects, and skipping right to Presta Swirl Remover to flatten and take out any left over swirls.

Protect Your New Finish: Now that you've gone through all of this work you're going to want your new finish to last. For your final step, we recommend adding a coat of Presta Fast Wax to keep the finish protected. Apply the wax in straight horizontal and vertical strokes – DO NOT USE A CIRCULAR MOTION. Forget what you learned from the Karate Kid, you've just spent a considerable amount making sure that your finish was swirl free. Don't add swirls back in when applying your wax!
Note: The Presta Shop Pak provides a great way to get all of the products you need in one, convenient kit. To find a local distributor, click here. Or, to order your Shop Pak online, click here.
Article Rating:
